A portal is simply a subset of the entire eBird database enabled to support specific projects, in this case our Atlas. Because we do not need the ability to manage observations collected from other parts of the world, our own portal provides direct and quick access to just NC Bird Atlas data. Records entered into eBird through any portal will also appear on the main eBird website, so don’t worry, all your observations and checklists still live in core eBird!
All eBird checklists can potentially count towards the Atlas, but they are more valuable when added to our specific data portal for several reasons:
-
- It allows us to organize, visualize, and use data much more quickly and easily.
- It indicates that you understand the Atlas concepts, such as the use of breeding codes, priority blocks, and protocols – check out our field guide as a quick reference!
- Your time spent Atlasing can help fund the project!
- Your observations count for promotions, like the Big Atlas Weekend.
Changing Your Portal in eBird
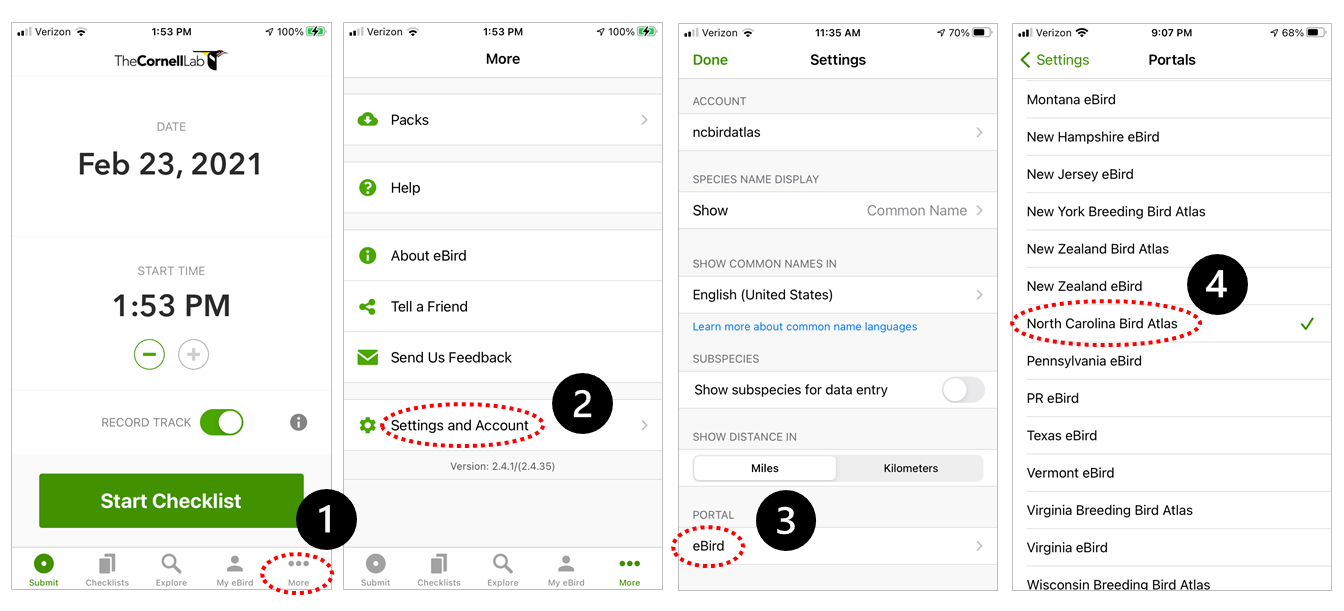
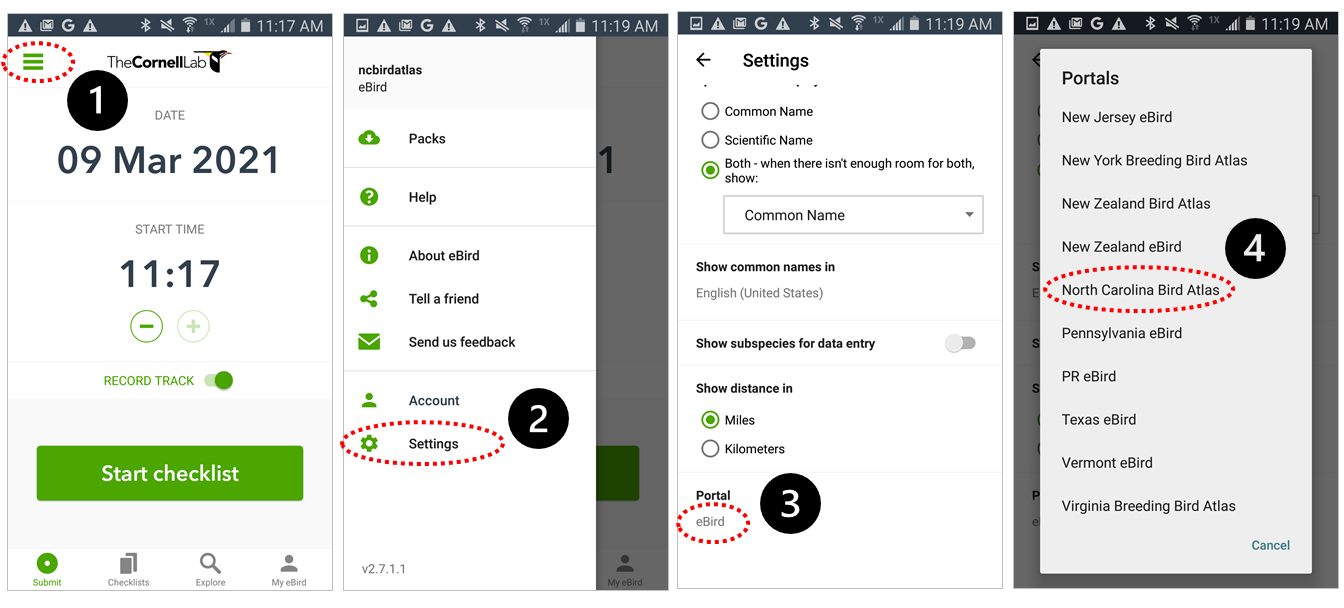
Once you have created an account and installed the eBird app, you can set your data to be logged in the NC Bird Atlas portal using the following steps.
iOS
Android
Changing Your Checklist Portal on eBird.org
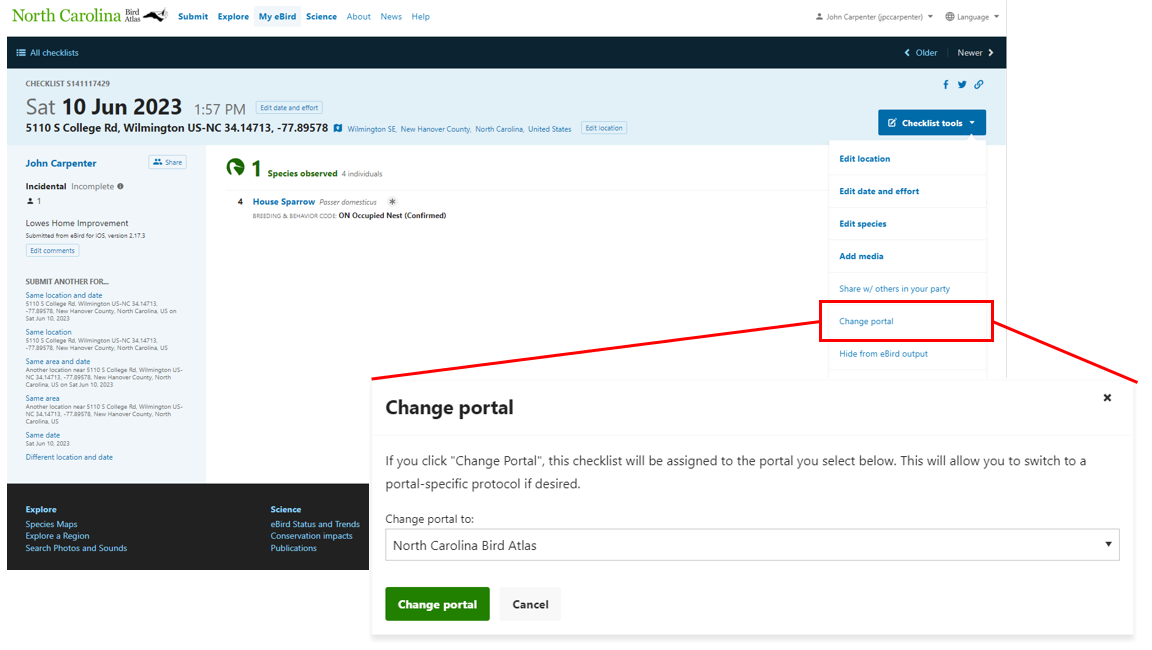
If a checklist is not in the NC Bird Atlas Portal or you submitted it to the wrong portal through the app, you can only change it online. Find the checklist you want in My Checklists. Then, go to “Checklist Tools” in the top right and select “Change Portal”. Use the drop-down menu to change the portal.